
How to Paint Stone Bases
Trying something a little different this week… a tutorial! There have been a few requests to share how I knock out these stone bases and I thought it might be fun to show the process.
A quick note, this is something I’ve been doing on and off between other projects. You may notice the photos are wildly different quality, and I just didn’t stop to think about checking my settings (or even previous pics). I’ll have to beg your patience for this one, guys. It’s my first day.
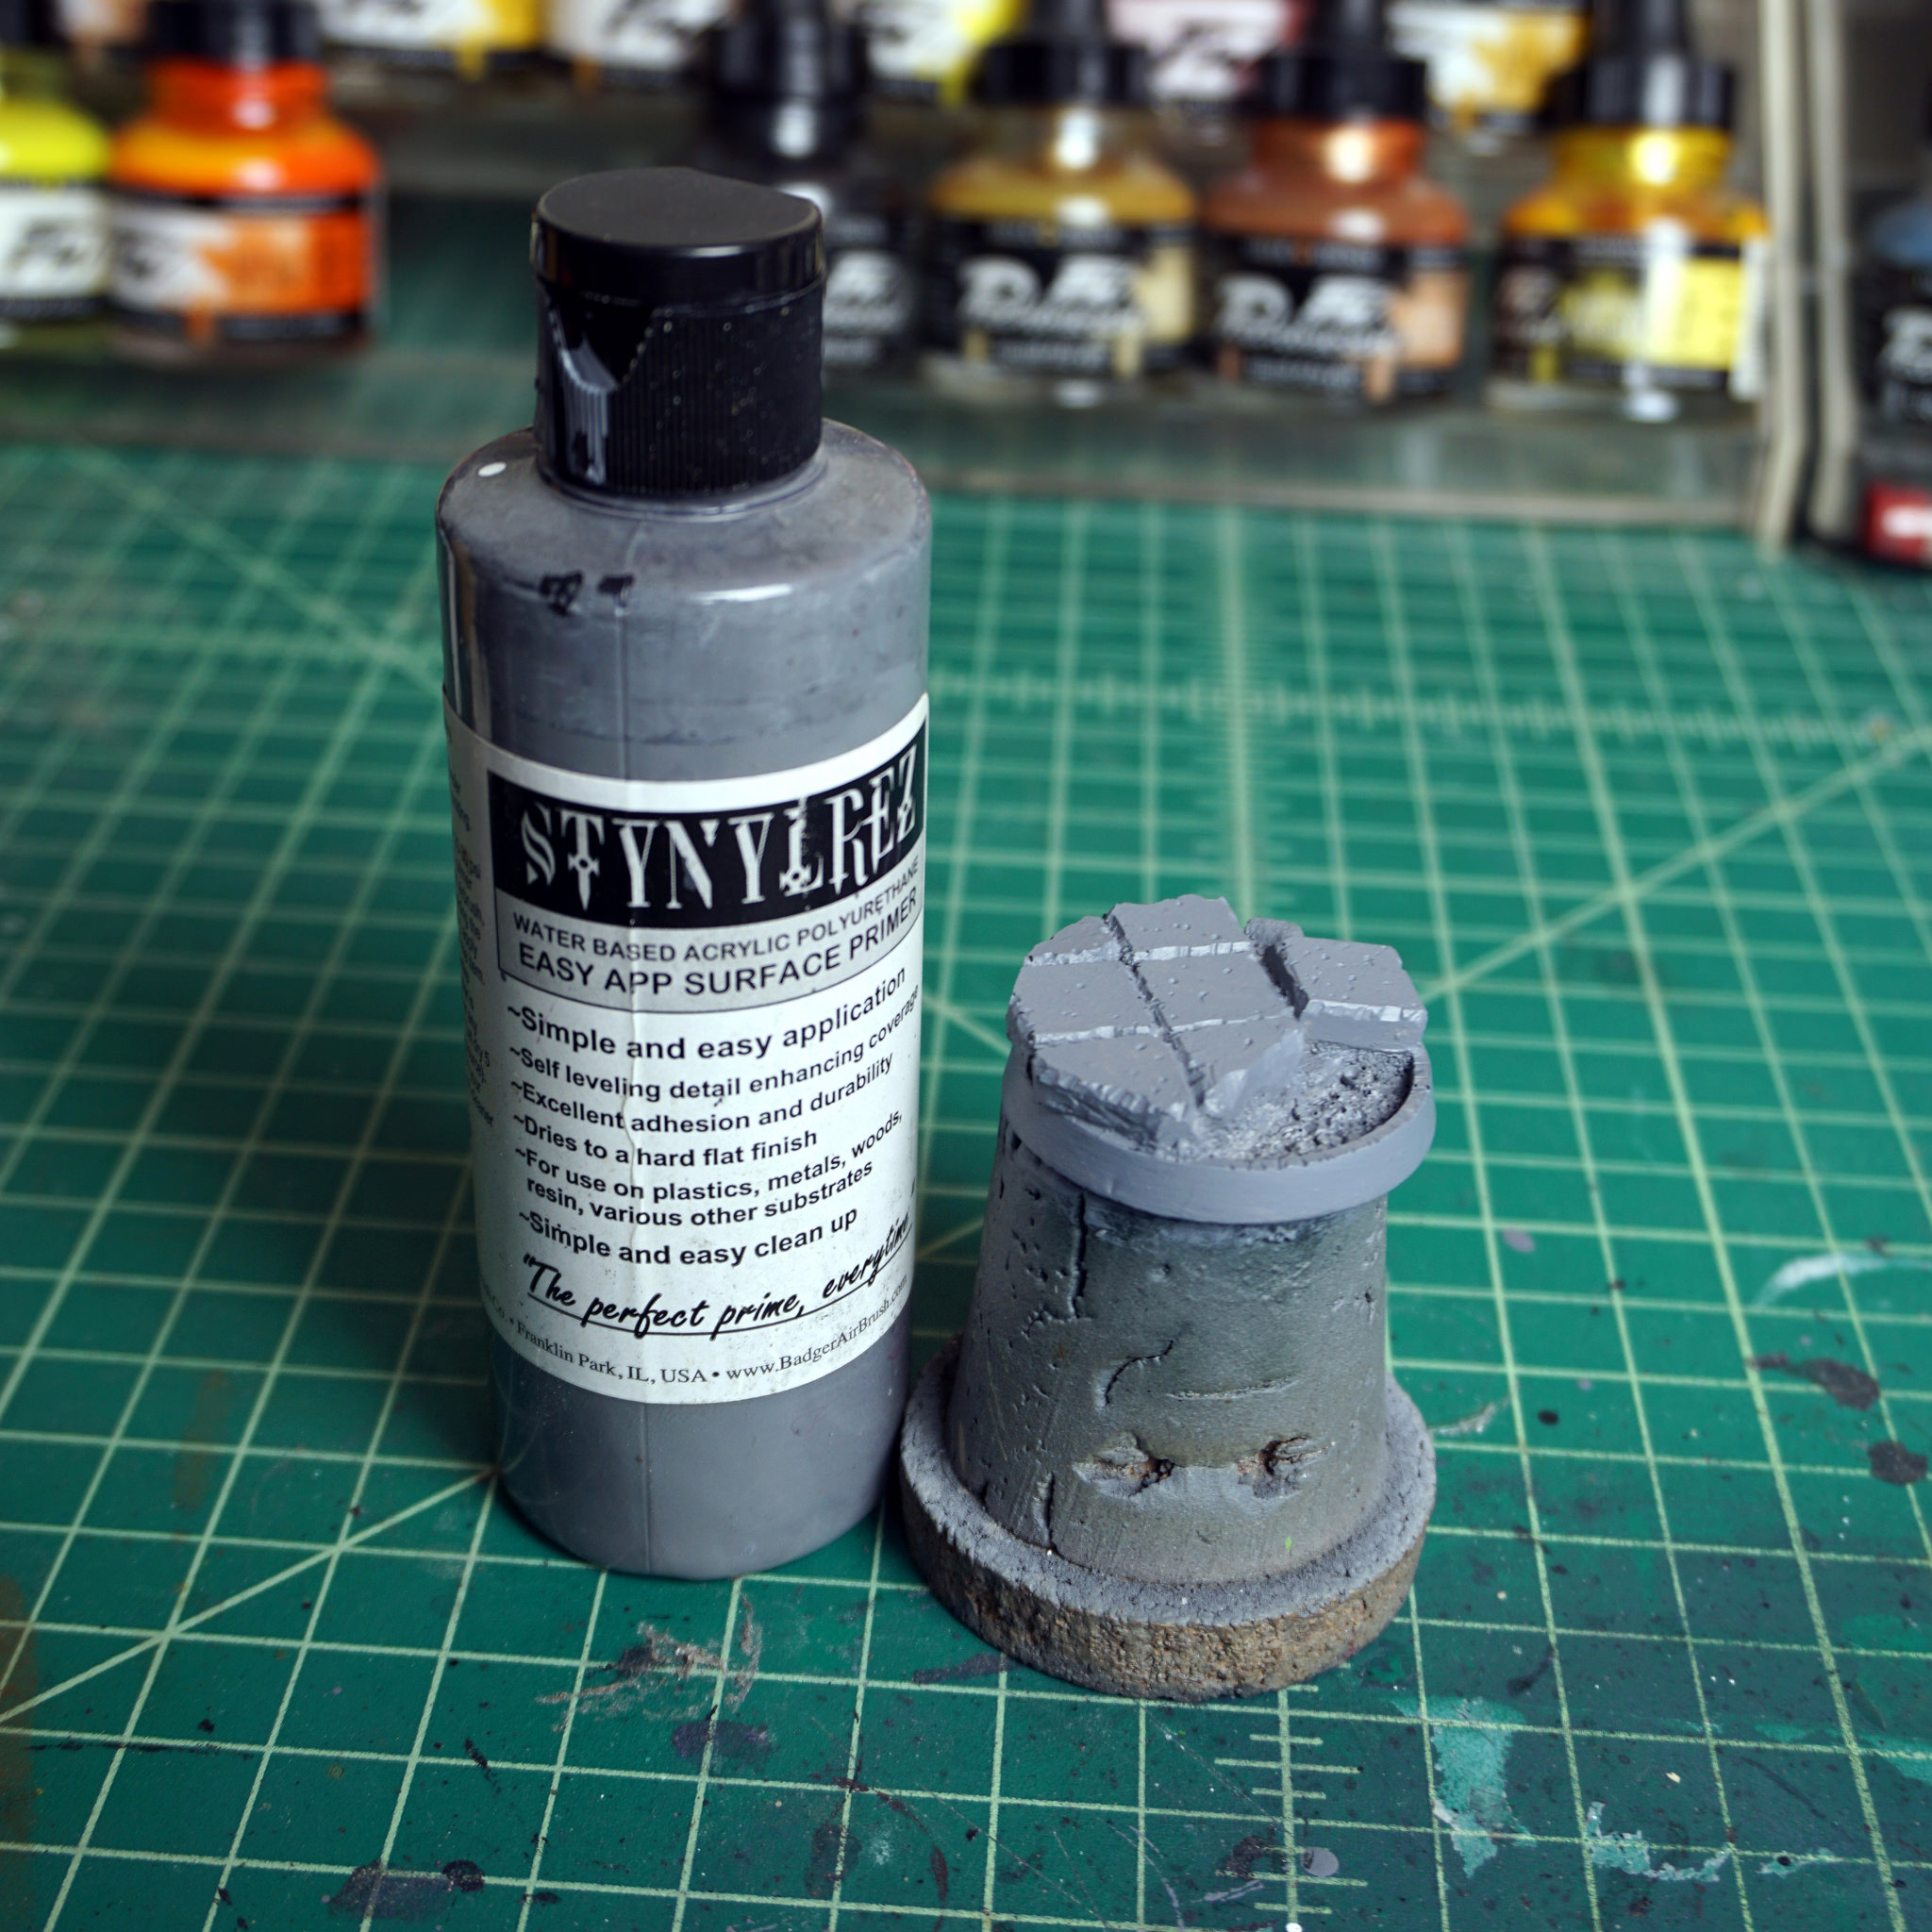
First and foremost, you’re going to need a base to paint. I’m a huge fan of the Ancient Ruins Series bases from Dragon Forge Design. This is a 40mm base from Ancient Ruins 2. There’s a waiting list on orders at Dragon Forge, but they’re always worth the wait. Excellent sculpting and fantastic quality casts!
After washing and rinsing your base in warm soapy water (to remove the mold release and help paint adhere), it’s time to prime. I like the Stynylrez primers from Badger Airbrush for this. It goes on smooth and just works great. Bizarre name, great primer.
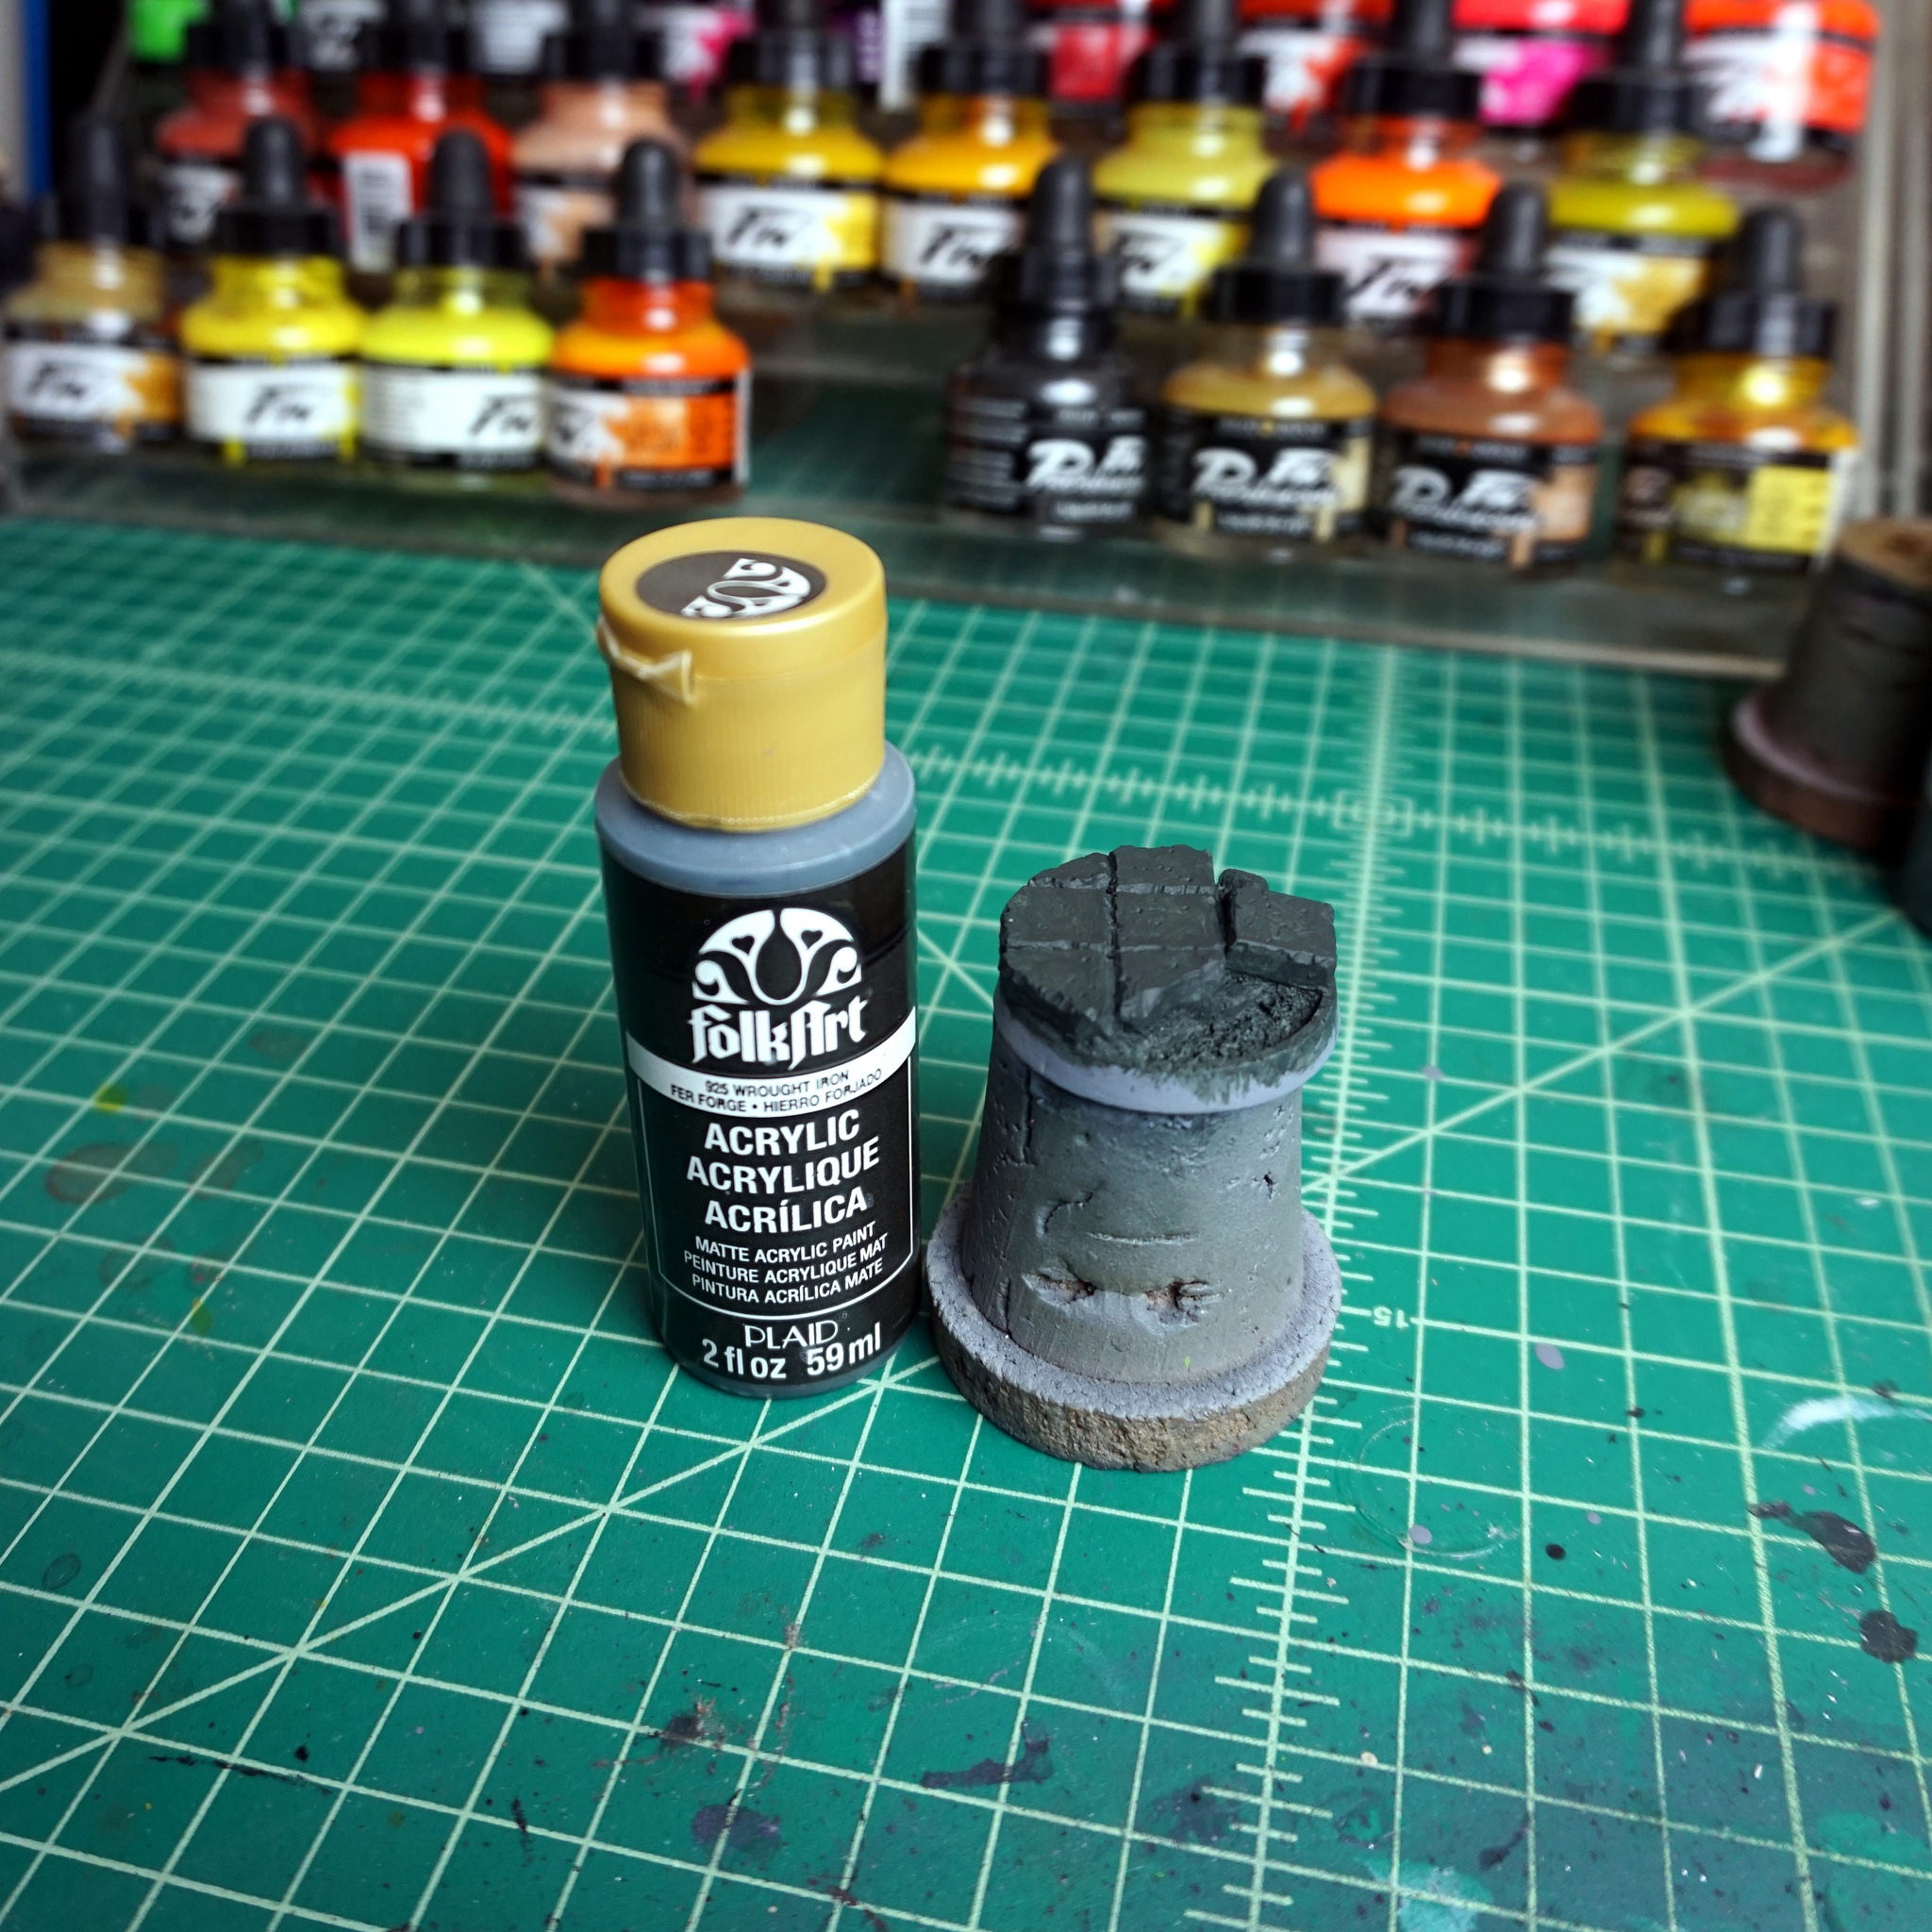
Once the primer is dry, it’s time to lay down a basecoat on Wrought Iron, a green that’s so dark it’s nearly black, from Folk Art. You can get these inexpensive craft paints from most hobby or craft stores. They’re very thick and don’t cover well, so be patient and work in thin coats. I put probably 3 coats of Wrought Iron down to get what you see here.
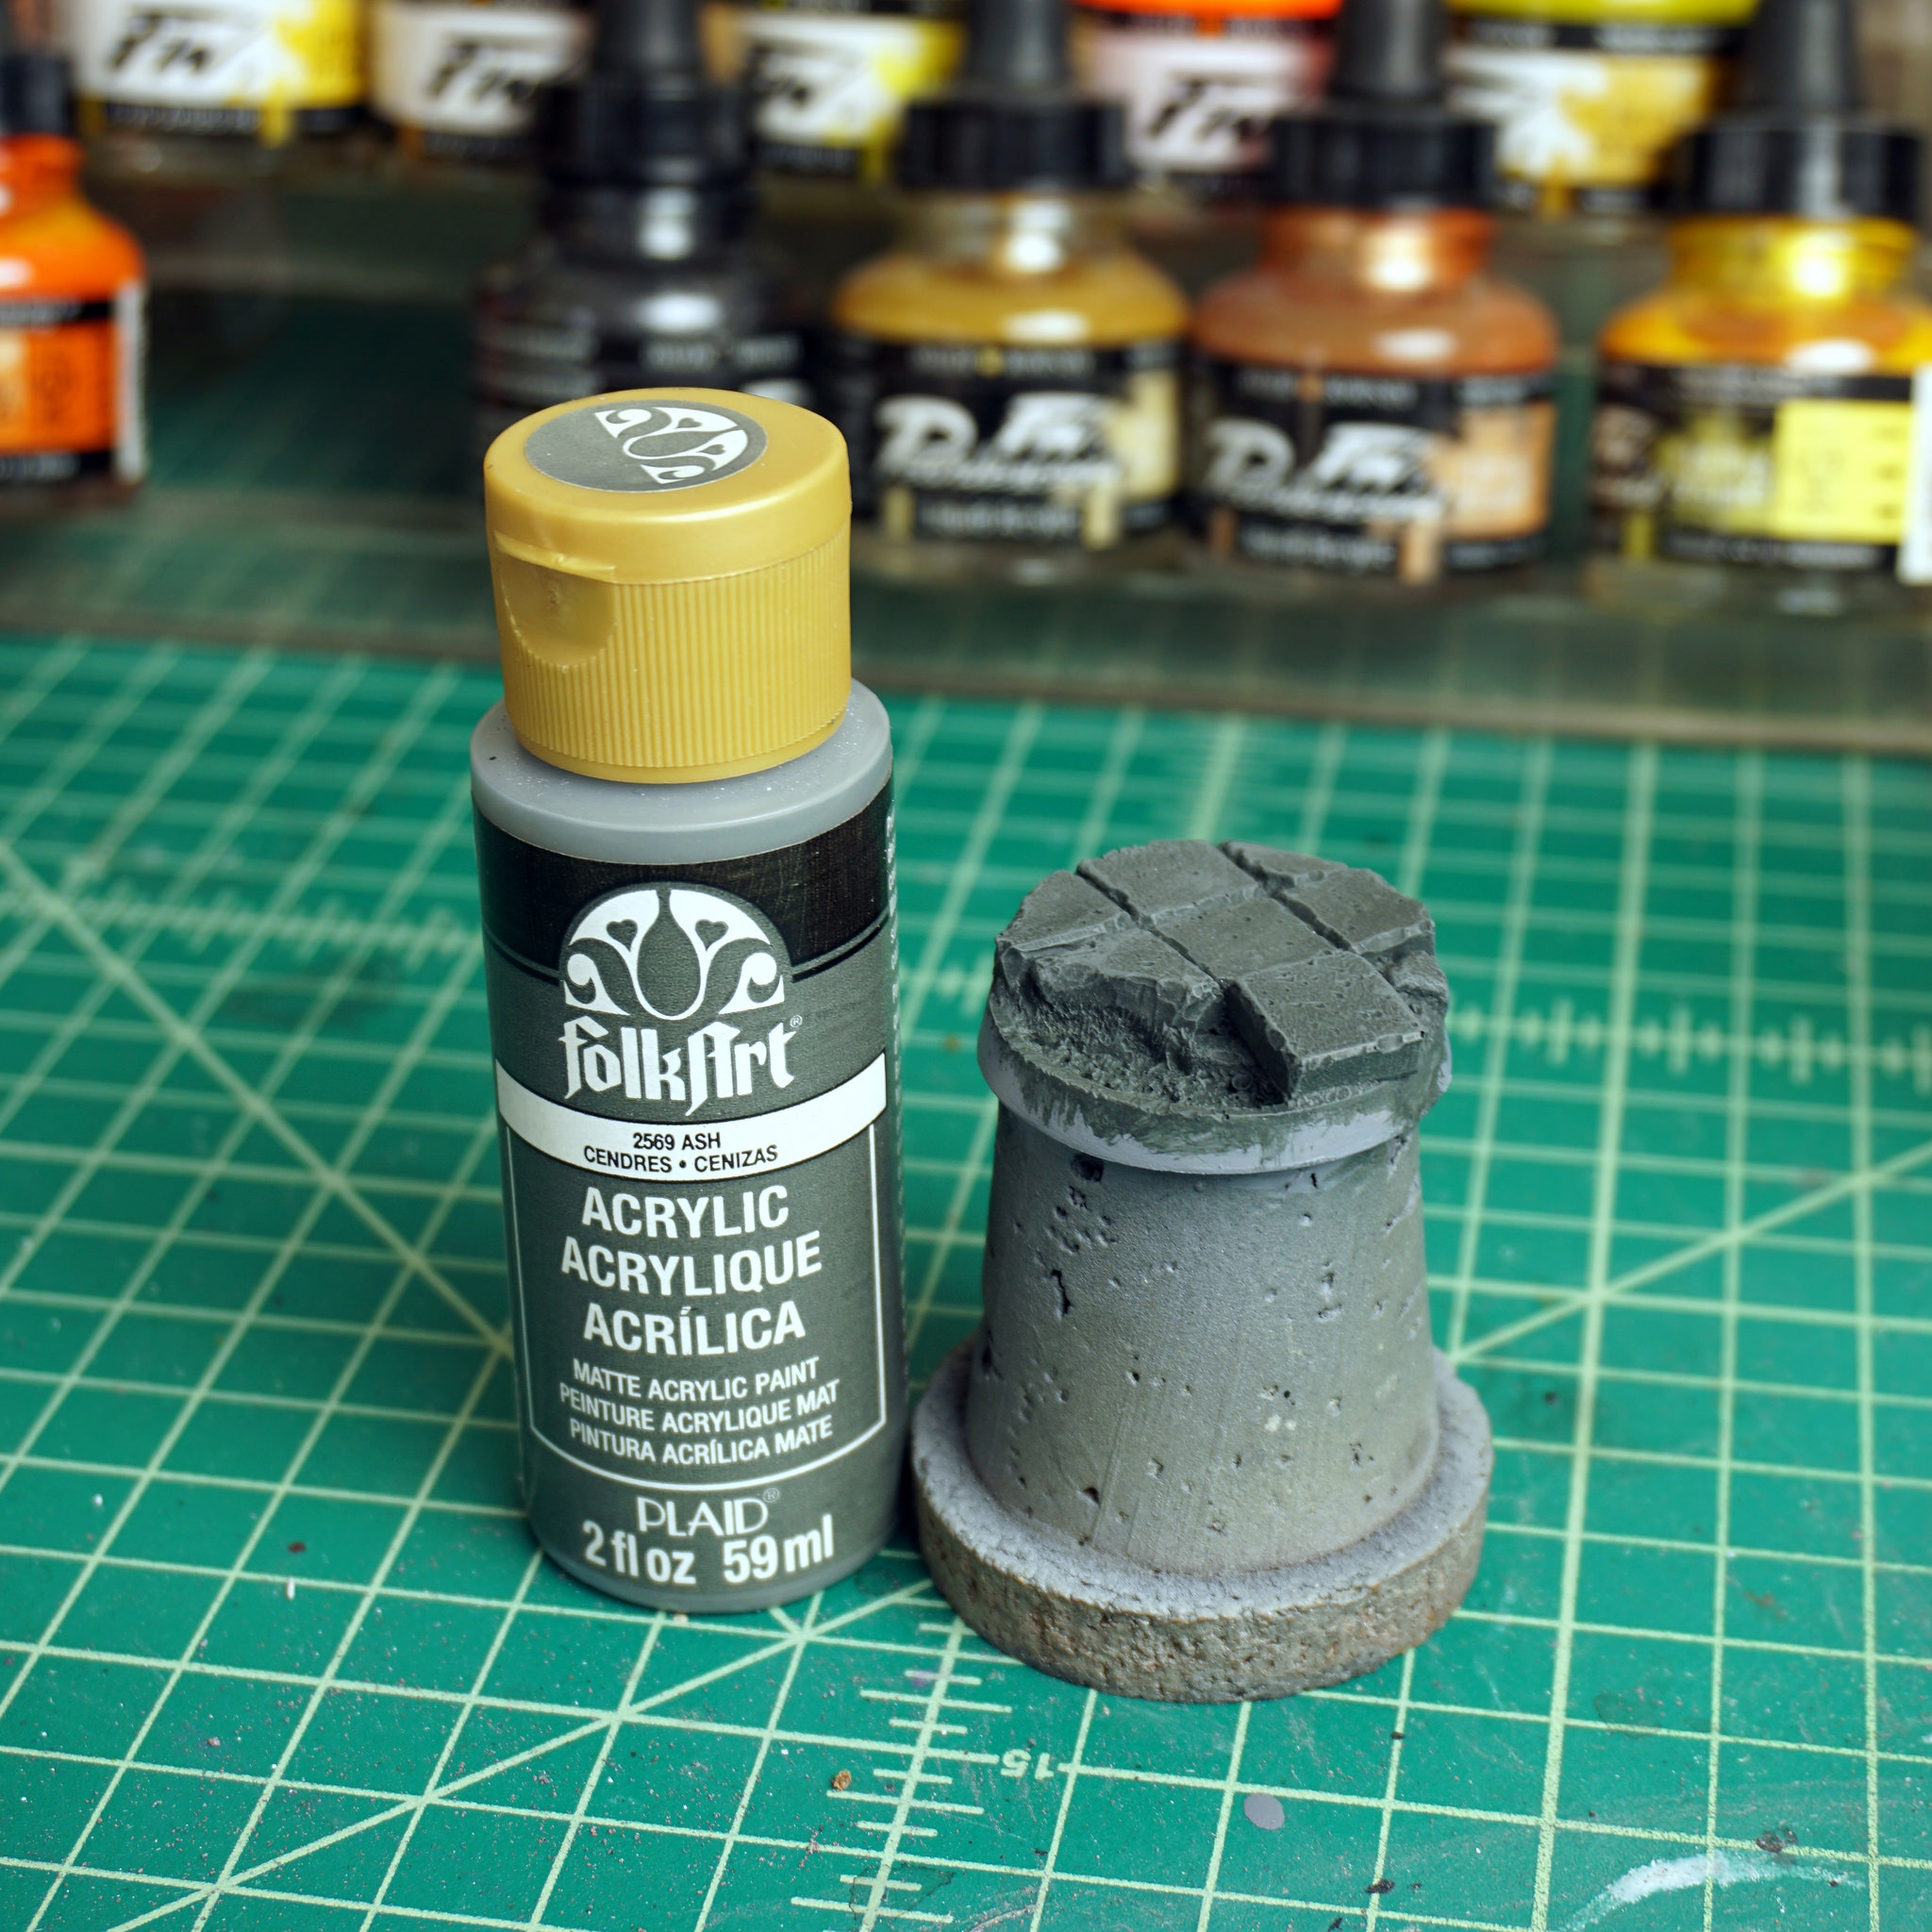
Now that our base coat is ready, we can do the first highlight. We’re going to drybrush Folk Art Ash onto the rocky surface of the base. To do that, you put some paint on a wide, flat brush then wipe most of it off on a paper towel until there is very little paint left. When you run the brush across the base, the paint will stick only to the raised edges of the stone texture, creating a quick and easy highlight. Simple!
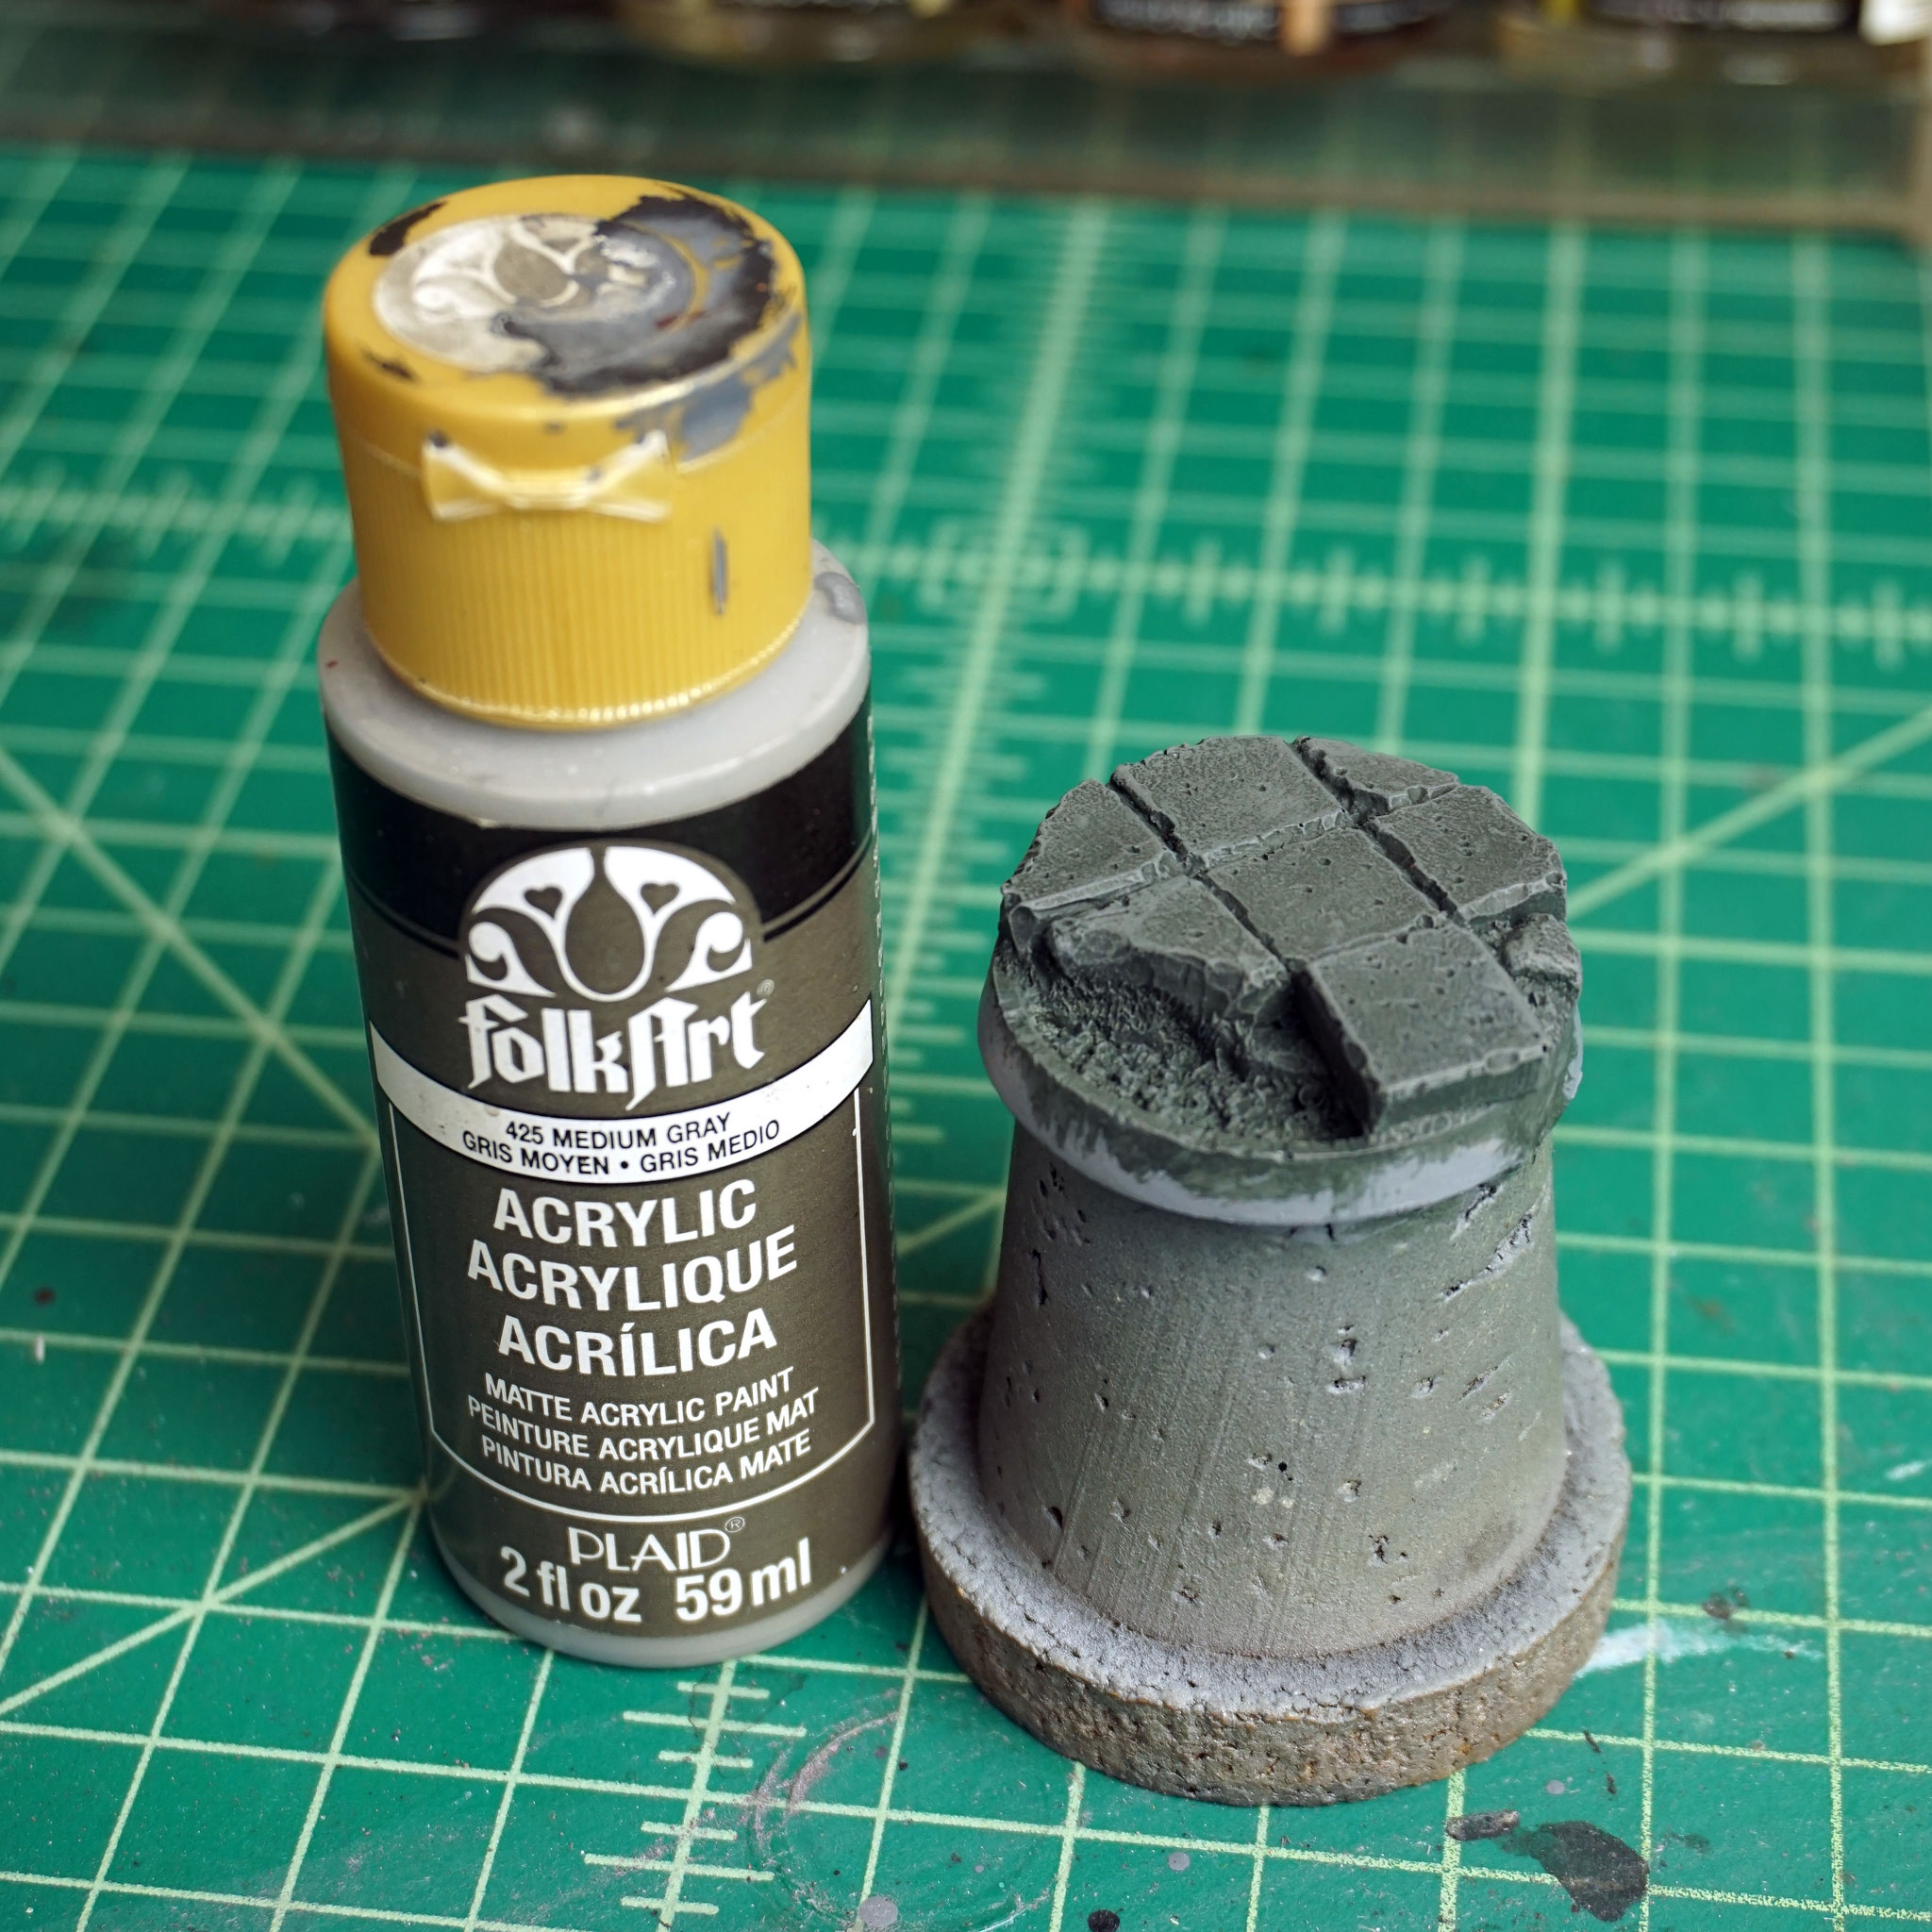
The final highlight is another, even lighter drybrush of Folk Art Medium Grey, just to catch the highlights on the very edges. In this photo, you can see better how the greys play on the dark green basecoat to look like dark, almost mossy stone. If you want a different effect, change your base color and see what happens. Experiment and make it your own!
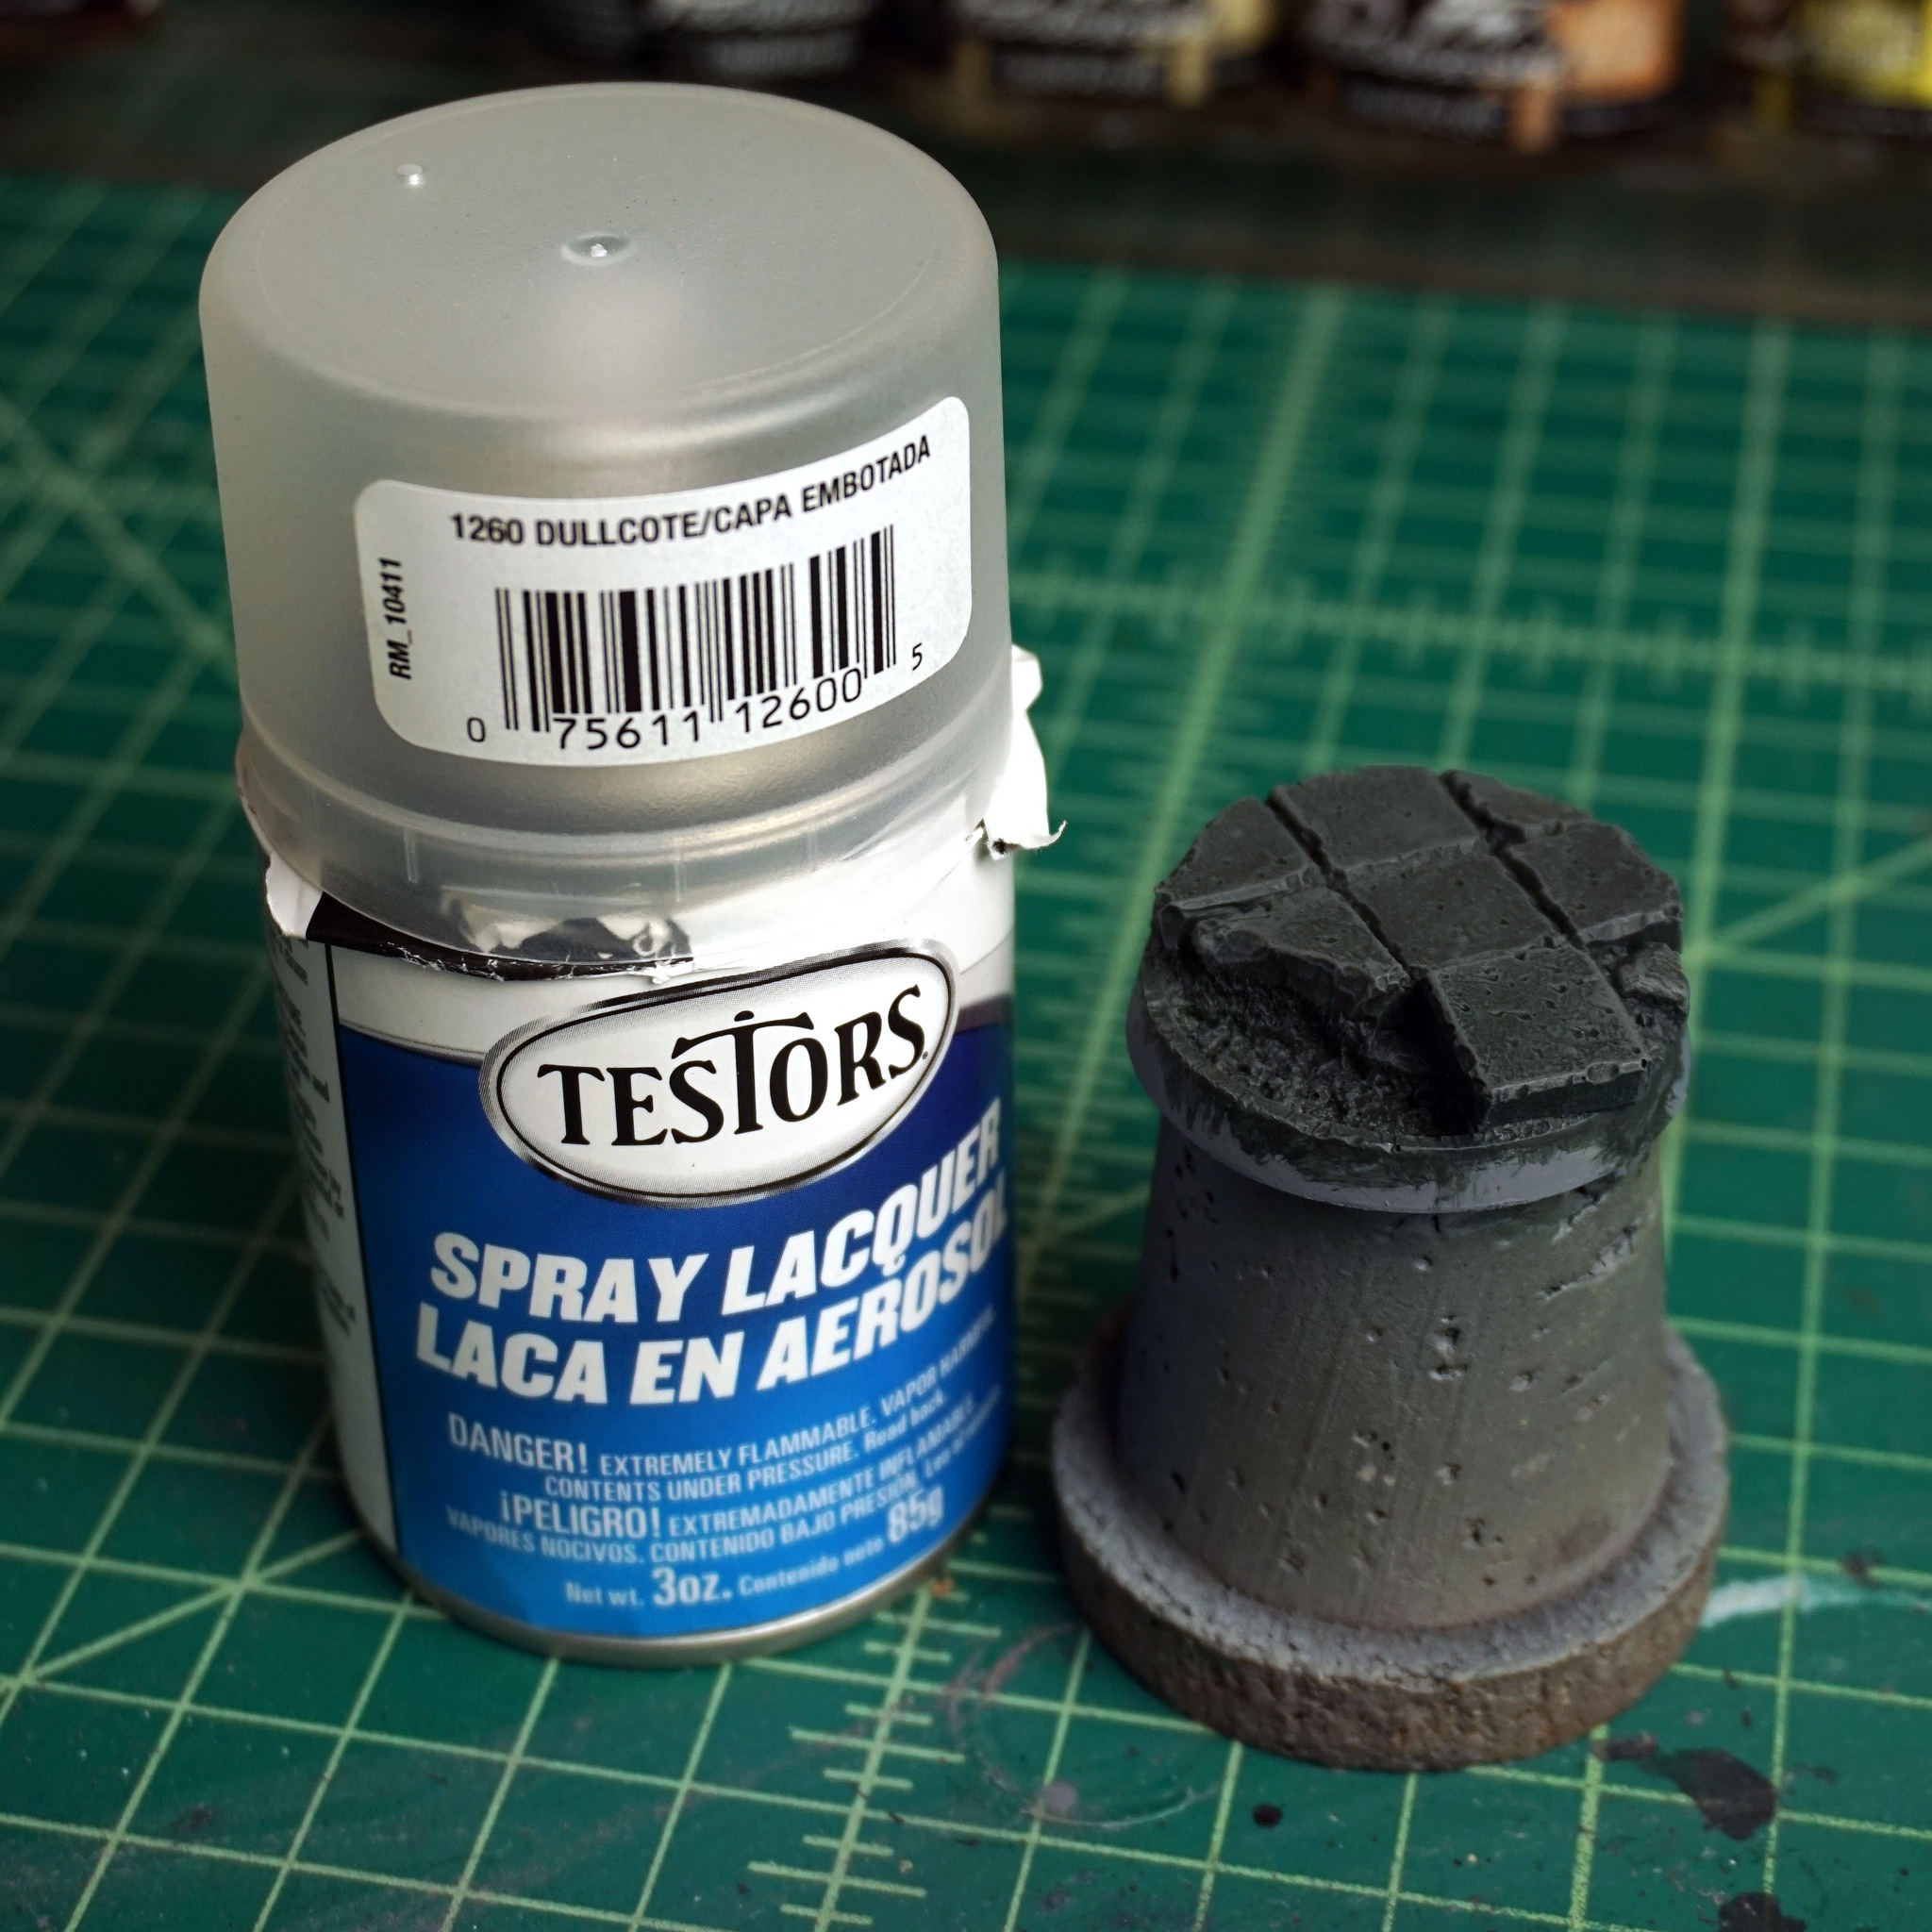
Our stone is finished and it’s time to protect our work. I use Testors Dullcote because it’s just the best. I’ve never had any problems with it and it dries to an almost complete matte finish. Lovely stuff.
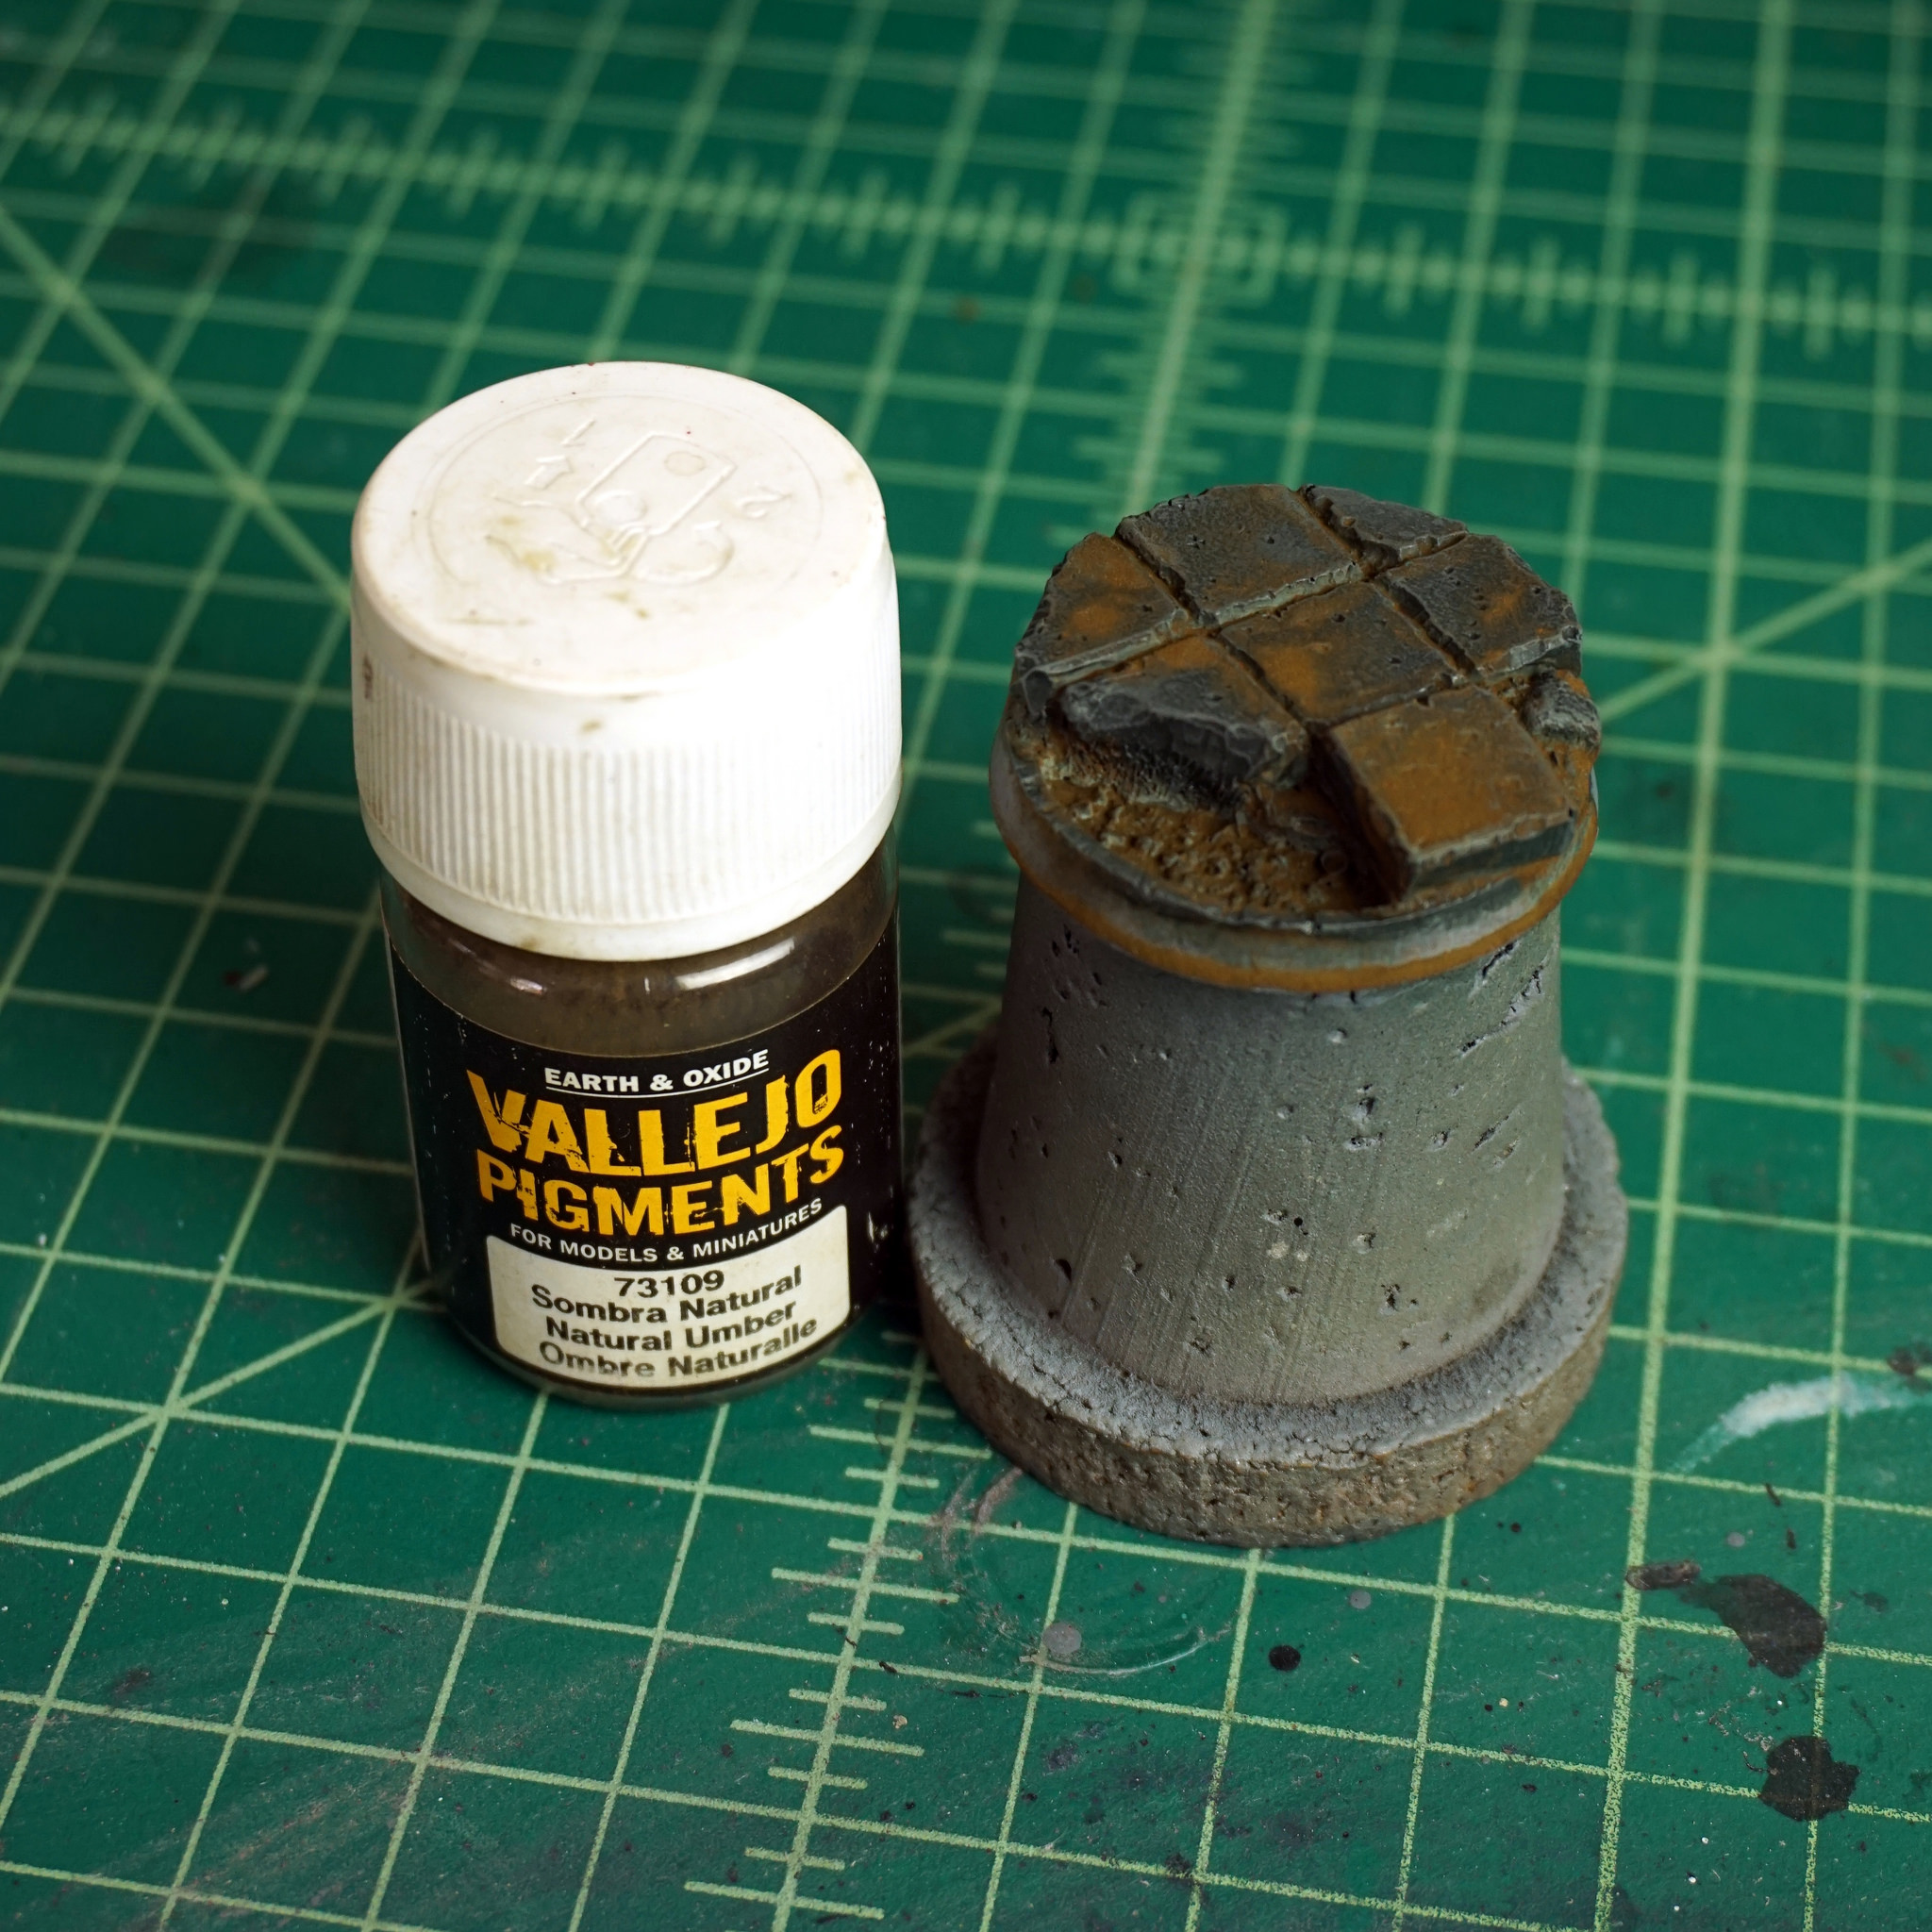
It’s time for my favorite step in the entire process… the pigment! For this, I use Natural Umber pigment powder from Vallejo mixed in isopropyl alcohol and just splash it into the cracks and crevices. Anywhere that dirt or dust may have accumulated gets some pigment. Some of the flat areas get a dab, just to create interest and help tie all the colors together.
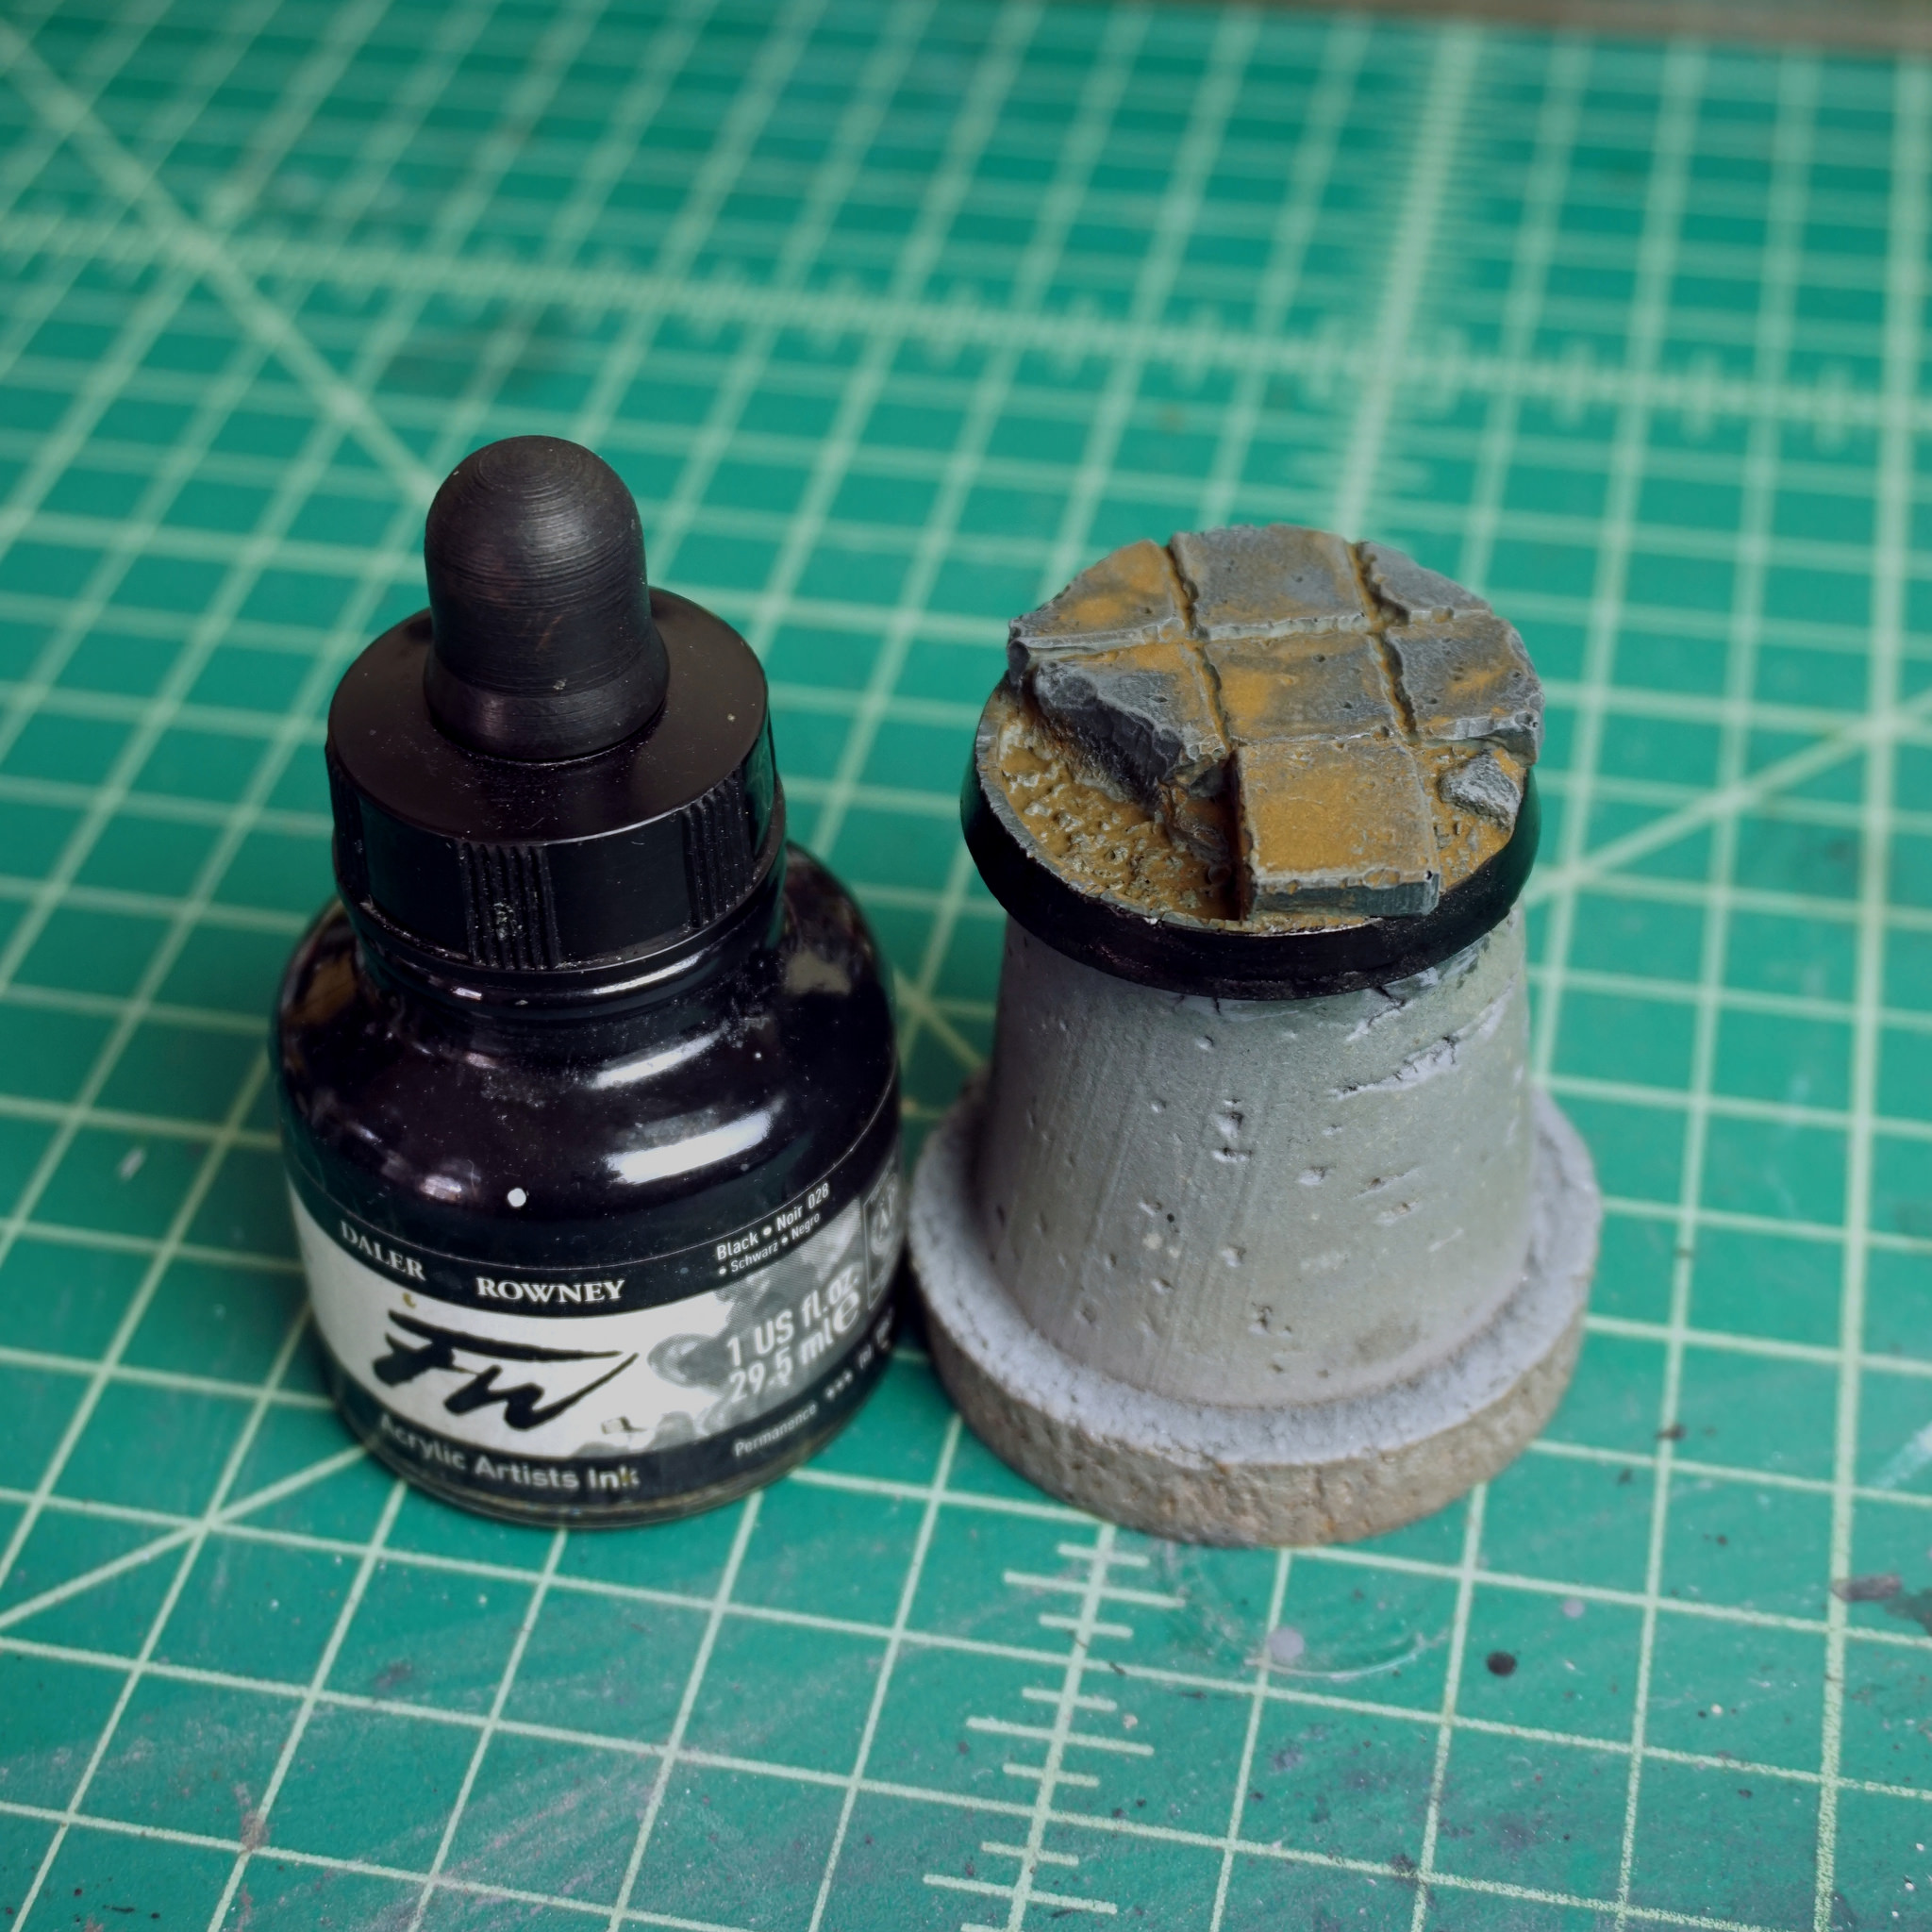
When the pigment dries, all that’s left is to paint the rim of your base. Most people choose a color that compliments their army or their gaming table, but I’ve gone for a lovely FW black ink to help the base details really pop and stand out against whatever the base is sitting on.
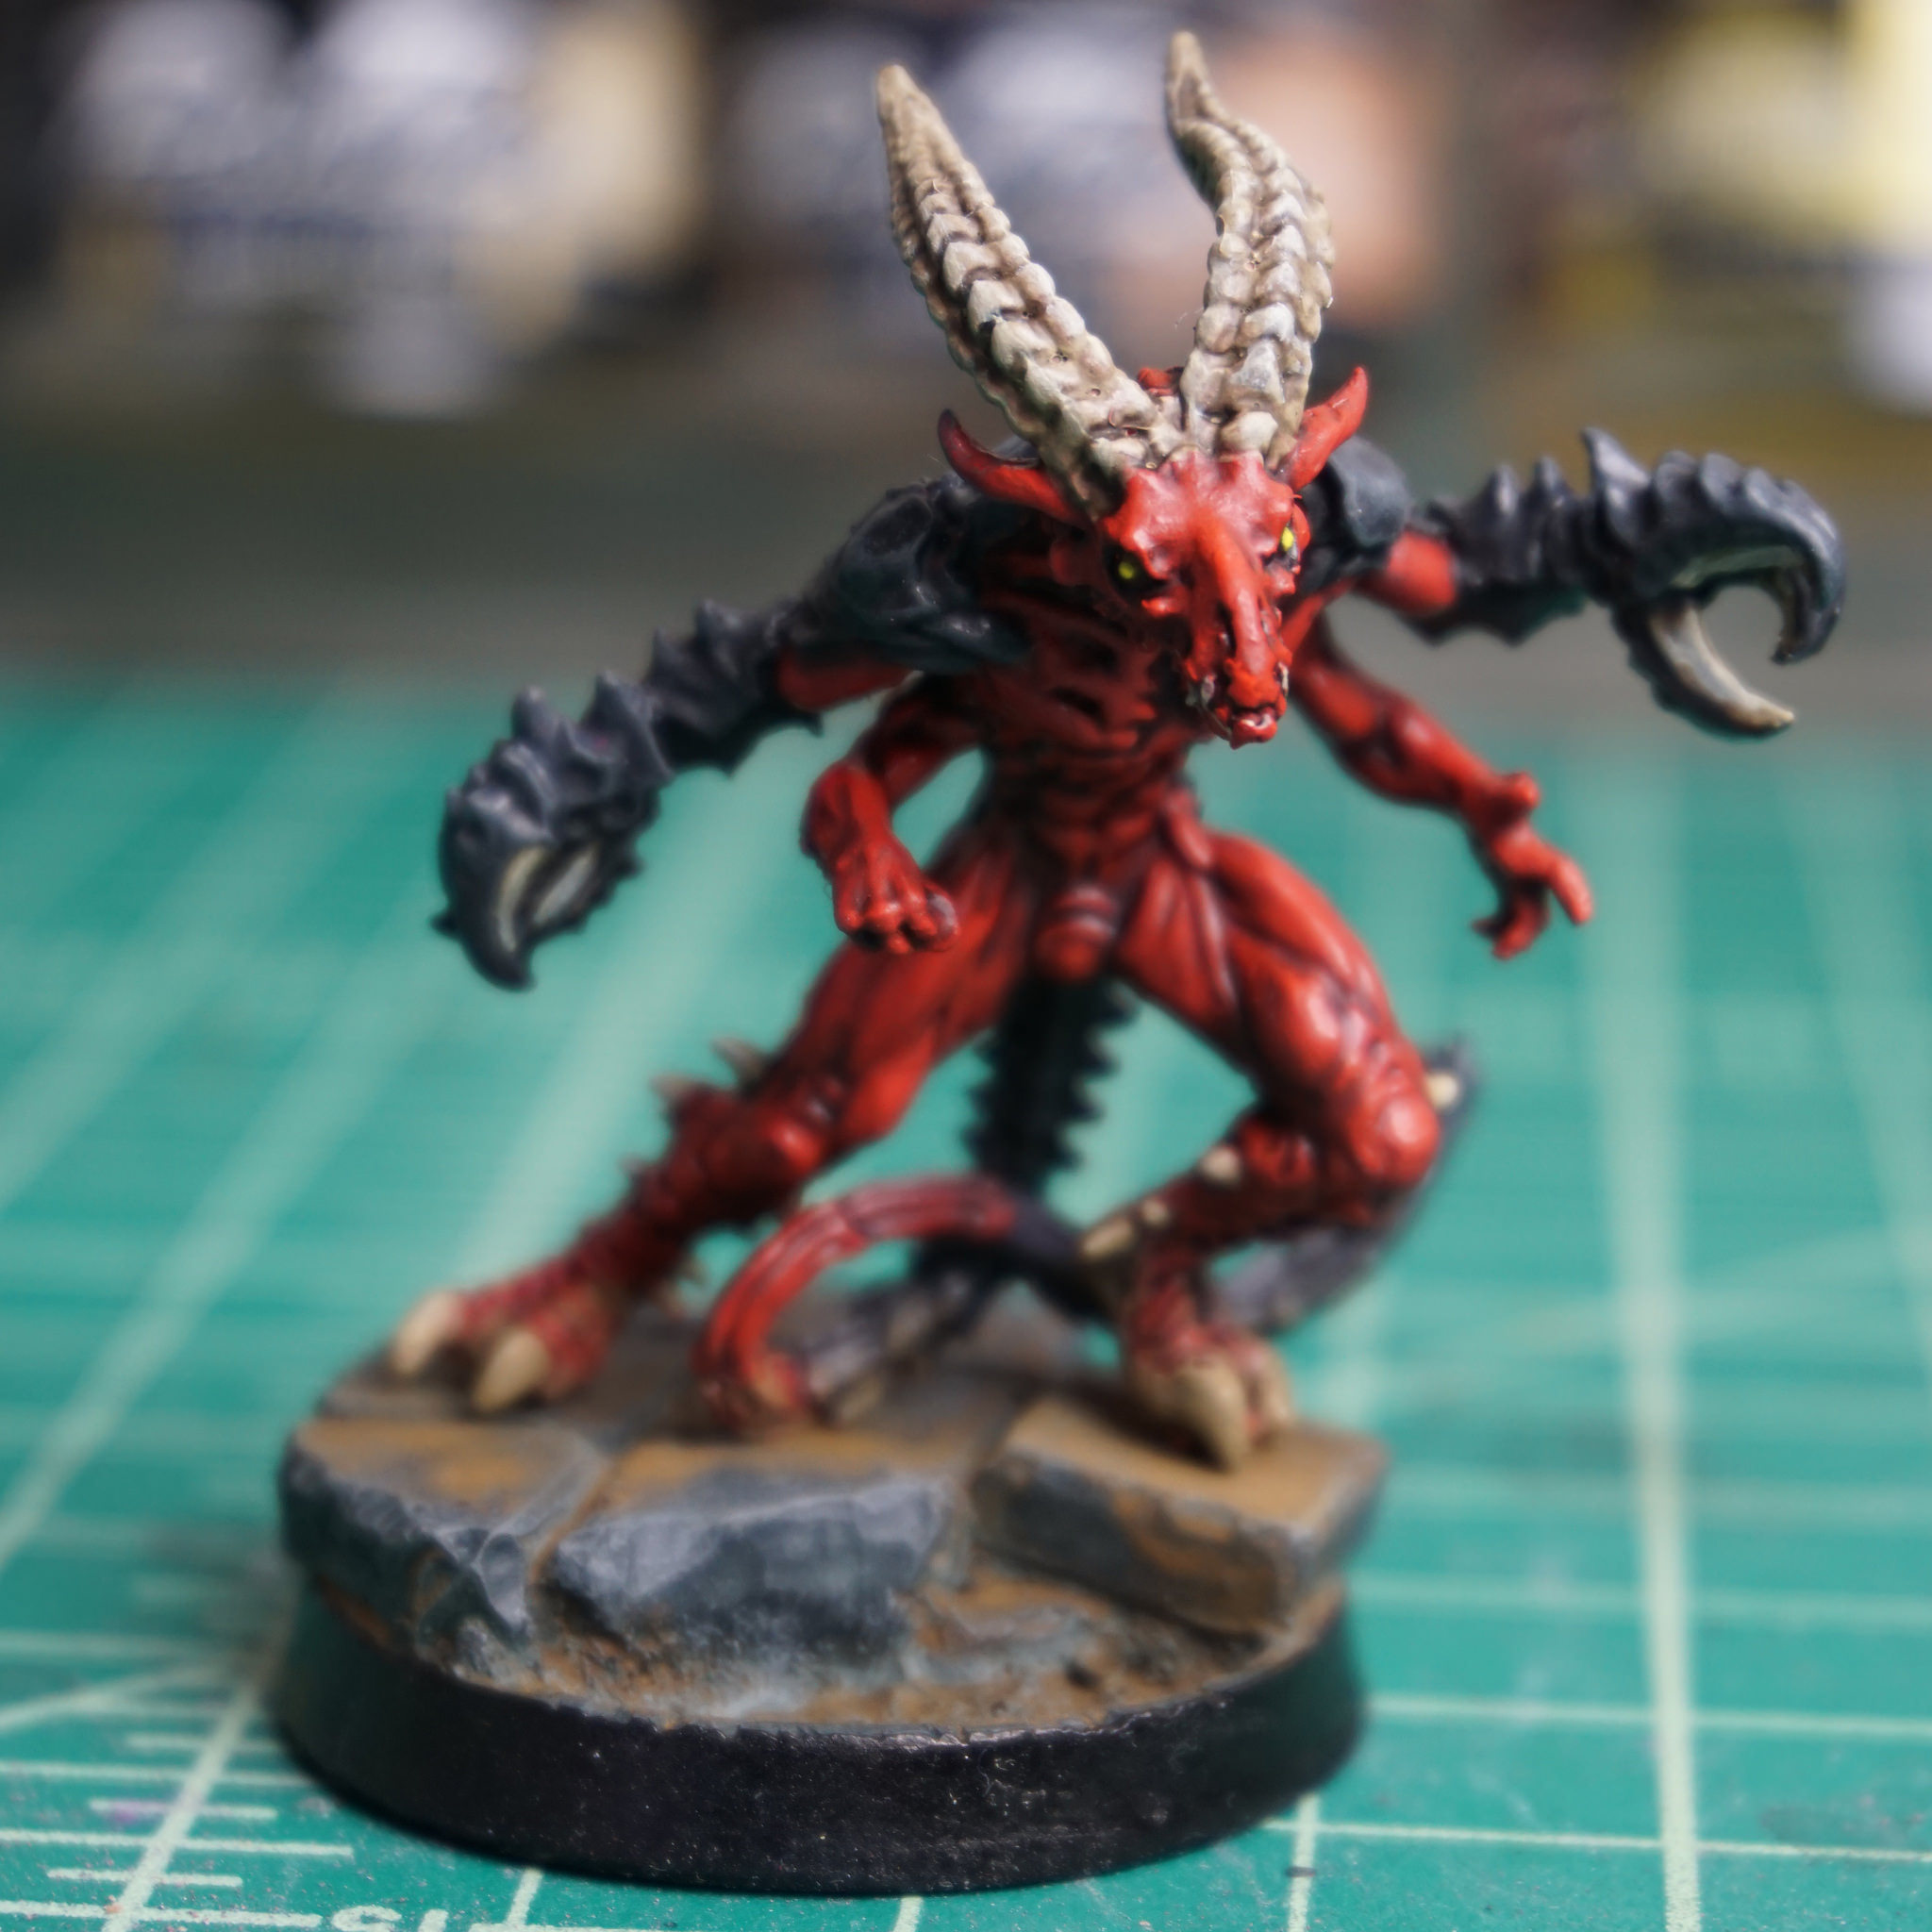
And that’s it! All that’s left is to glue your model down and send it into the dungeon.
Was this helpful? Interesting? Would you like to see more tutorials? Would a video be a better format for this sort of thing? Let me know!
Be good,
-Dave
nobody’s down here